Best Practices for Capturing Interior Building Data: Tips for Floor Plan Accuracy
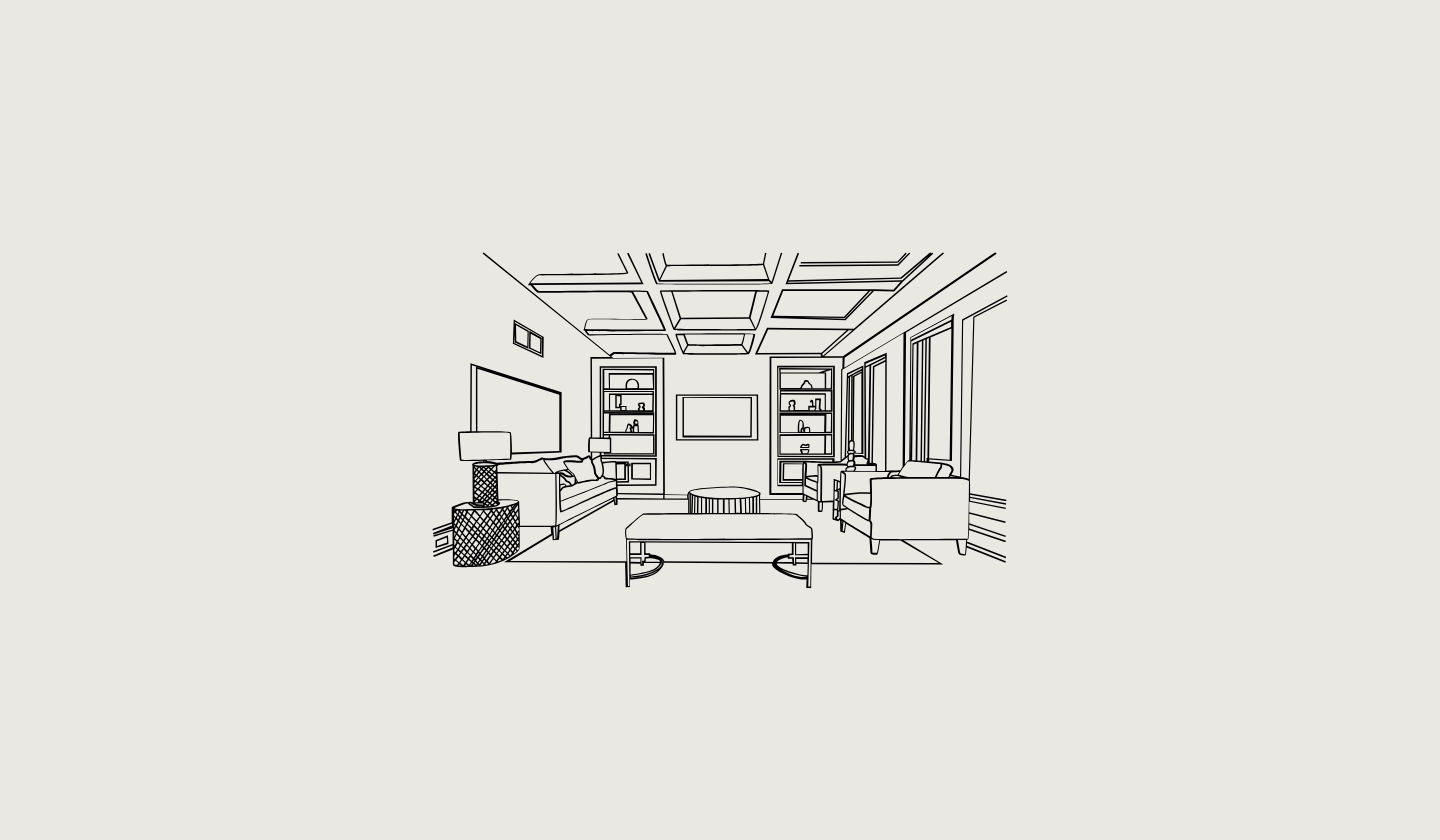
When it comes to interior building documentation, precision is everything. Whether you’re designing a renovation, managing facilities, or developing digital twins, accurate floor plans form the backbone of every decision. Yet, capturing that data isn’t as simple as pointing a laser or snapping a few photos. Even small errors — a misplaced wall line or a few centimeters off in dimension — can cascade into costly design issues, construction rework, and compliance problems down the road.
Interior data capture is both a science and a craft. It requires the right mix of planning, technology, and on-site discipline to get results that can be trusted. This article breaks down the best practices that professionals rely on to achieve high-accuracy floor plans every time.
And if you’d rather focus on design while leaving the capture work to experts, we’ll also introduce a professional data capture service at the end that delivers survey-grade accuracy and ready-to-use building models.
Understanding Interior Data Capture
At its core, interior building data capture is the process of collecting measurable information about the spaces inside a structure — every wall, doorway, ceiling height, and feature that defines how a space functions and connects.
The output might be a 2D floor plan, a 3D model, or a BIM dataset, but the principle stays the same: translate the real world into precise digital geometry.
Typical data captured includes:
- Spatial geometry: room dimensions, wall thicknesses, doors, windows, and columns.
- Vertical dimensions: ceiling heights, floor elevations, and level transitions.
- Utilities and infrastructure: MEP (mechanical, electrical, plumbing) elements that affect layout and design.
- Fixtures and furnishings: essential for interior designers, retail planners, and fit-out contractors.
These measurements feed multiple industries:
- Architecture: for redesigns, renovations, and as-built documentation.
- Construction: for verification and clash detection in BIM workflows.
- Real estate and property management: for space optimization and digital marketing.
- Facilities management: for maintenance planning and compliance audits.
In short, capturing interior data accurately ensures that every downstream task — from design modeling to energy simulation — starts from the truth.
Challenges in Capturing Accurate Interior Data
Capturing interior data sounds straightforward until you’re on-site. The reality is full of complications.
1. Measurement errors: Even a small calibration issue or misaligned tripod can skew results. Human error — especially when working manually — compounds over multiple rooms.
2. Environmental factors: Poor lighting, reflective glass, narrow hallways, or crowded furniture all interfere with data collection.
3. Complex geometries: Many interiors aren’t composed of simple right angles. Curved walls, irregular atriums, and varying ceiling heights can confuse sensors if not approached methodically.
4. Legacy buildings: Older properties often lack up-to-date drawings, and some areas might be inaccessible due to renovations or safety concerns.
5. Technology limitations: Not all devices handle large interiors or intricate details equally. Stitching multiple scans together introduces its own potential for alignment errors.
Accurate capture depends on more than just tools — it depends on a consistent workflow designed to eliminate uncertainty at every step.
Best Practices for High-Accuracy Floor Plans
1. Plan Before You Scan or Measure
Every great survey starts before you unpack your equipment. A pre-site assessment saves time and prevents oversights.
- Review existing data. Study available drawings or previous scans. Even if they’re outdated, they reveal structural logic and potential obstacles.
- Define your goals. Are you capturing for schematic design, detailed modeling, or facility management? Each requires a different level of detail (LOD).
- Establish tolerance levels. Knowing whether ±2 cm or ±5 mm accuracy is required guides equipment choice and data density.
- Create a route plan. Walk the site to identify choke points and plan your capture path. This minimizes redundant scans and missed zones.
- Coordinate access. Schedule around occupancy, secure keys to restricted areas, and clear furniture where possible.
A well-planned workflow keeps capture efficient and systematic.
2. Choose the Right Technology
Different tools serve different purposes — the key is matching method to project.
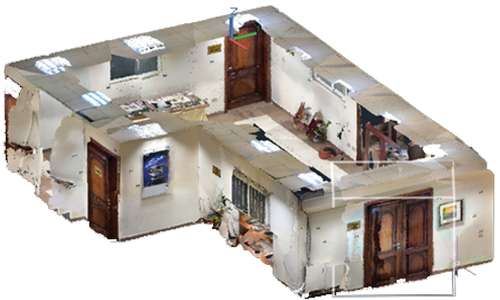
- Laser Scanners (LiDAR): Offer the highest accuracy, typically within a few millimeters. Ideal for architectural documentation, detailed as-builts, and complex geometries.
- Mobile LiDAR and SLAM (Simultaneous Localization and Mapping): Faster, handheld, and efficient for large interiors or occupied spaces. Slightly less precise but ideal for time-sensitive projects.
- Photogrammetry: Uses imagery to reconstruct geometry. Useful for visual detail and texture mapping, though accuracy depends on camera calibration and control points.
- Total Stations: Still valuable for control points and validation in high-precision environments.
Regardless of tool, calibration is non-negotiable. Regular checks ensure accuracy remains consistent across sessions.
3. Control Your Environment
Your environment impacts your data quality as much as your gear.
- Maintain consistent lighting — shadows and glare distort photogrammetry results.
- Reduce movement and obstructions in the scanning path.
- Place markers or reference targets for alignment between scans.
- Use a zone labeling system to identify each room or section, which simplifies post-processing.
Even simple steps like closing blinds or clearing reflective surfaces can prevent data noise that’s difficult to clean later.
4. Capture Redundancy and Overlap
It’s tempting to minimize scan count to save time, but lack of overlap creates stitching errors.
- Maintain at least 30% overlap between consecutive scans.
- Capture key transition zones (doorways, stairwells) from multiple angles.
- Include vertical scans to record ceiling heights and elevation differences.
- If possible, use tripod-based control scans as reference anchors.
This redundancy pays off when aligning point clouds, reducing distortion, and ensuring the floor plan maintains geometric integrity.
5. Document Metadata and Field Notes
Data without context is useless later. Keep thorough field documentation.
- Record the date, operator, device model, and environment conditions for every session.
- Note any areas inaccessible or measured indirectly.
- Attach photographs of irregular spaces, hidden corners, or unique features.
- Create a reference legend for room labels and measurement units.
This step is often skipped — but when a team revisits data weeks later, these notes become indispensable.
6. Quality Control and Post-Processing
Accuracy verification happens after capture, not before delivery.
- Perform spot checks with manual measurements to validate scan accuracy.
- Use software tools to clean point clouds — remove noise, misalignments, and duplicates.
- Align scans using control points or reference targets, not just automatic algorithms.
- Check for dimensional consistency between floors, sections, or adjoining areas.
- Compare against existing floor plans to detect structural changes or deviations.
Document achieved accuracy and note tolerances — transparency builds client trust and professional accountability.
7. Collaborate Across Disciplines
Interior data doesn’t live in isolation. Architects, engineers, surveyors, and BIM specialists all depend on it — and interpret it differently.
- Align early on file formats, coordinate systems, and required outputs.
- Use shared platforms to review scans and notes in real-time.
- Establish version control to avoid overwriting data.
- Encourage feedback loops between capture teams and design/modeling teams.
Collaboration ensures the captured data actually meets project needs, not just technical standards.
8. Keep Data Secure and Organized
Poor data management can undermine great capture work.
- Adopt consistent file naming and folder structures.
- Tag each dataset with metadata (location, date, operator).
- Use cloud-based collaboration with version tracking.
- Backup all data in at least two secure locations.
- Archive deliverables in industry-standard formats (DWG, IFC, E57) for long-term use.
Good organization means your data stays usable, shareable, and verifiable years after the project ends.
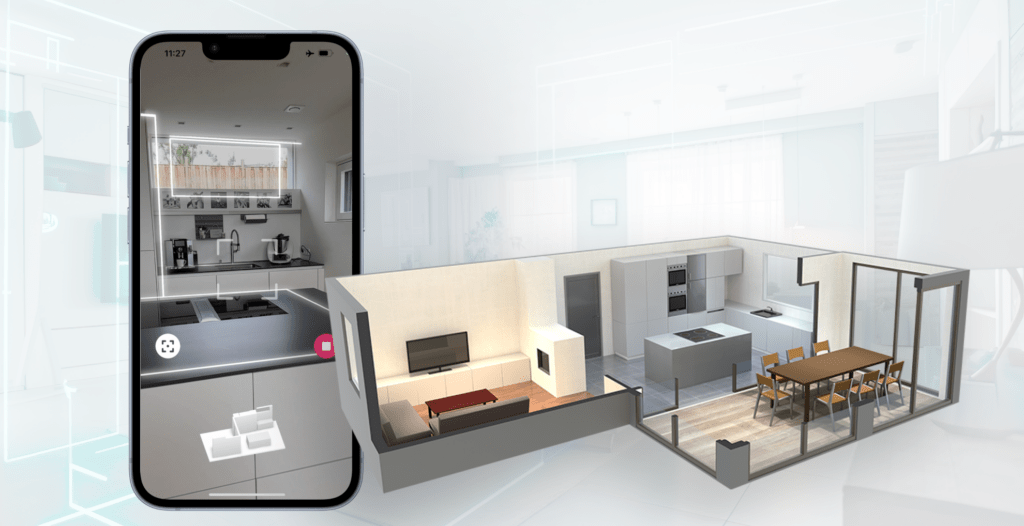
Leveraging Technology for Smarter Capture
The future of interior data capture is increasingly automated — but precision still depends on human oversight.
AI-driven processing now automatically cleans point clouds, aligns scans, and even identifies building elements like walls and openings. Handheld LiDAR scanners make it possible to map entire interiors in minutes. Drone-assisted indoor mapping is emerging for large industrial environments with high ceilings or restricted access.
Integration with Building Information Modeling (BIM) platforms closes the loop: scanned data flows directly into Revit or ArchiCAD environments, reducing manual tracing and modeling time.
Yet, technology can only enhance a solid process — it can’t replace it. Skilled operators, clear planning, and disciplined workflows remain the foundation of reliable, repeatable accuracy.
Common Mistakes to Avoid
Even experienced teams fall into pitfalls that compromise results. Avoid these at all costs:
- Skipping equipment calibration or reference points.
- Capturing too few scans or insufficient overlap.
- Forgetting to record vertical data like ceiling heights and stair levels.
- Relying on raw scan data without verification or cleanup.
- Poor documentation, leaving teams guessing what each file represents.
Every mistake adds risk. The fix is simple: slow down, document, and verify before moving to the next step.
When to Hire a Professional Data Capture Service
Sometimes, doing it yourself isn’t worth the risk — especially when precision and timelines are critical.
You should consider a professional service if:
- You’re dealing with large or complex interiors (multi-story buildings, mixed-use spaces).
- Your project requires survey-grade accuracy (e.g., for BIM integration or compliance documentation).
- You have tight deadlines or lack in-house scanning resources.
Professional capture teams bring:
- Certified technicians using calibrated, high-end equipment.
- Standardized workflows that guarantee accuracy and completeness.
- Fast turnaround, even for large-scale portfolios.
- Seamless data delivery — CAD, Revit, or BIM formats ready for immediate use.
In short, professional data capture ensures you start every project on solid ground.
If your focus is design, engineering, or operations — not data collection — outsourcing saves time, reduces risk, and delivers results you can trust.
Conclusion
Capturing interior building data with high accuracy isn’t about fancy tech alone — it’s about discipline, process, and attention to detail. From careful pre-planning to rigorous post-processing, every step shapes how reliable your floor plans will be.
As buildings become more digital, accuracy is the bridge between the physical and virtual worlds. Investing in solid capture methods today means fewer surprises, smoother coordination, and more informed decision-making tomorrow.
If your project demands precision, speed, and reliability, our interior data capture service delivers survey-grade accuracy with complete 2D and 3D outputs — from measured floor plans to BIM-ready models.
Our team handles everything from on-site scanning to verified deliverables, so you can focus on design, not data.
Let accuracy be your foundation — and we’ll make sure it’s built to last.
Prefer to Speak Directly?
Experience precision in every project.