Getting Started with the RTC 360: Setup, Workflow, and Tips
.avif)
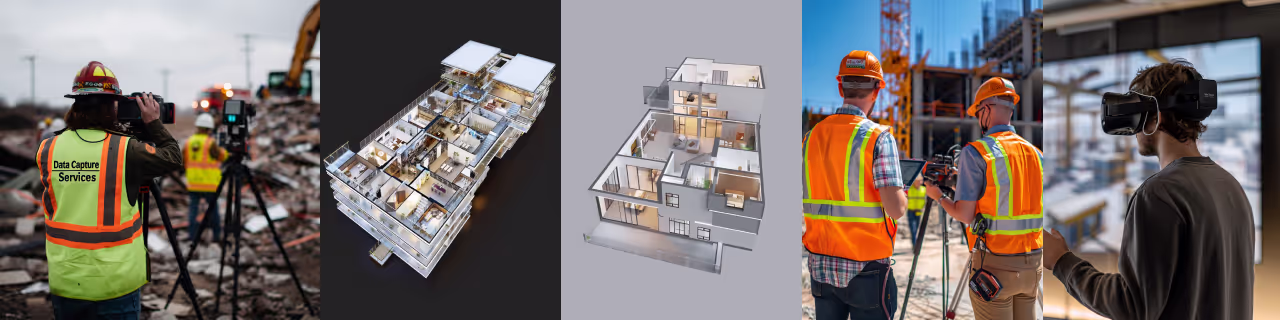
So, you've got your hands on an RTC 360, huh? That's a pretty cool piece of kit for capturing detailed 3D scans. But if you're like me, getting started with new tech can feel a bit like trying to solve a puzzle with half the pieces missing. This article is all about making that process easier. We'll walk through setting up your RTC 360, using it in the field, and then getting your data ready for whatever project you're working on. Think of this as your friendly guide to getting the most out of your scanner, without all the confusing jargon. Let's get scanning!
Key Takeaways
- The RTC 360 uses special cameras and sensors to track its location automatically, which helps align scans.
- The Cyclone Field 360 app lets you control your scanner, check data quality, and add notes while you're working.
- You can add specific tags, called GeoTags, to your scans to include extra information like pictures or notes.
- Even if the automatic alignment doesn't work perfectly, you can still line up your scans by hand.
- After scanning, you can clean up your data, create high-quality images, and make reports for your projects.
Understanding the RTC 360 System
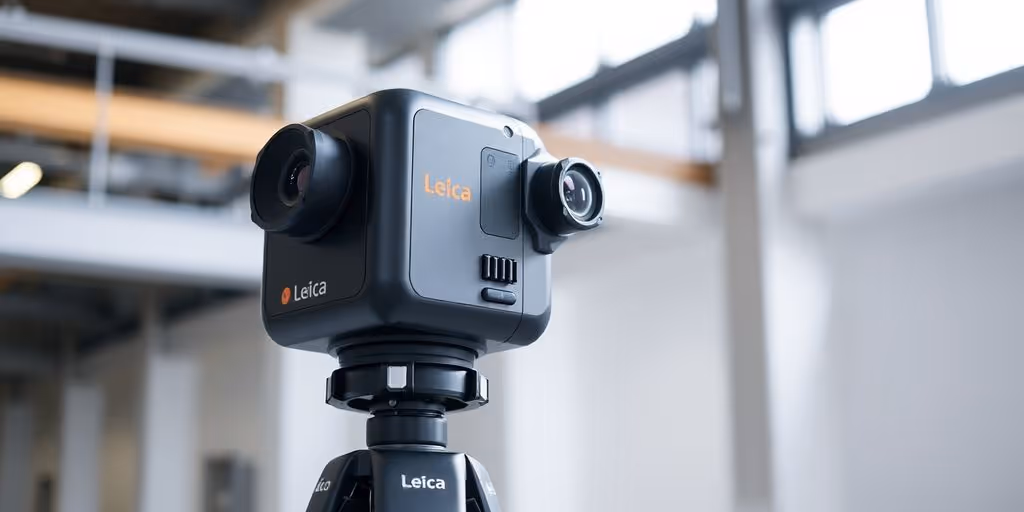
Alright, let's get into the nitty-gritty of the RTC 360 system. It's more than just a scanner; it's a whole ecosystem designed to make 3D reality capture as smooth as possible. I remember the first time I used it, I was honestly a bit overwhelmed, but once you break it down, it's pretty straightforward. The RTC360 is a great tool for georeferencing capabilities.
Capture reality in high detail and translate it into actionable data. Our 3D Scanning Services provide a fast and accurate way to document built assets, enabling better decision-making across planning, construction, and operations.
Core Components of the RTC 360
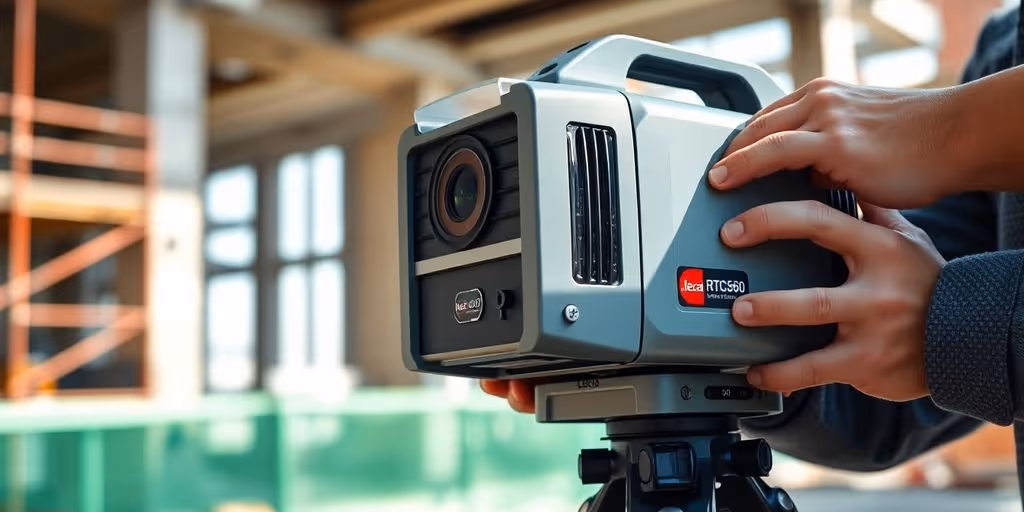
So, what makes up the RTC 360? Well, first, you've got the scanner itself, which is the heart of the operation. It's responsible for capturing all the point cloud data and imagery. Then there's the Cyclone FIELD 360 mobile app, which is your go-to for controlling the scanner, managing data in the field, and doing some pre-registration work. And finally, there's Cyclone REGISTER 360, the desktop software where you bring everything together, register your scans, and prepare your deliverables. Think of it as a team, each with a specific role to play.
- The Scanner: Captures point cloud data and imagery.
- Cyclone FIELD 360: Mobile app for scanner control and field data management.
- Cyclone REGISTER 360: Desktop software for registration and deliverable creation.
Visual Inertial System Explained
The Visual Inertial System (VIS) is a game-changer. Basically, it uses cameras to track the scanner's position as it moves through the environment. This is how the scanner automatically aligns scans. It's pretty cool tech, and it saves a ton of time in the registration process. The RTC360 uses the VIS to create links that are later used for auto-registration.
VIS technology really speeds things up. It's like having a built-in assistant that's constantly keeping track of where you are and how your scans fit together. It's not perfect, but it gets you a long way toward a clean registration.
Key Differences with RTC 360 LT
Now, let's talk about the RTC 360 LT. It's like the RTC 360's younger sibling. It's more affordable, but it does come with some trade-offs. The biggest difference is that the LT version doesn't have VIS technology. This means you'll have to rely on other methods for aligning your scans, like targets or manual alignment. It's still a capable scanner, but it requires a bit more work in post-processing.
Initial Setup and Configuration
Alright, so you've got your RTC 360. Now what? Let's walk through getting it all set up and configured so you can start scanning. It's not too bad, promise!
Connecting to Cyclone Field 360
First things first, you need to get your RTC 360 talking to Cyclone Field 360. This is the software you'll use on your tablet or phone to control the scanner in the field. Make sure both your scanner and your device are on the same Wi-Fi network.
Here's a quick rundown:
- Power on your RTC 360.
- On your tablet, open Cyclone Field 360.
- The app should automatically detect the scanner. If not, you might need to manually enter the scanner's IP address (check your scanner's documentation for this).
- Once connected, you'll see the scanner's live view on your tablet. Pretty cool, huh?
Show your space in the most engaging way possible. Our Virtual Tours Creation Services create immersive, interactive 3D walkthroughs that boost stakeholder engagement, accelerate approvals, and support remote collaboration.
Optimizing General Settings
Now that you're connected, let's tweak some settings to make sure you're getting the best possible data. General settings can really impact your workflow.
Inside Cyclone Field 360, poke around in the settings menu. You'll find options to adjust things like:
- Scan resolution: Higher resolution means more detail, but also longer scan times and bigger files. Find a balance that works for your project.
- HDR settings: HDR (High Dynamic Range) can make a big difference in tricky lighting situations. Experiment to see what works best.
- Scan duration: Adjust how long the scanner spends at each station. More time equals less noise, but also more time spent scanning.
Don't be afraid to play around with these settings! Every project is different, so what works for one might not work for another. It's all about finding what gives you the best results for your specific needs.
Activating GPS Information
If you're working outside, getting GPS data into your scans is super helpful. It makes it way easier to georeference everything later on.
To activate GPS:
- Make sure your tablet or phone has GPS enabled.
- In Cyclone Field 360, go to the settings and find the GPS section.
- Enable the option to record GPS data with each scan.
Keep in mind that GPS accuracy can vary depending on your location and the quality of your device's GPS receiver. If you need really precise positioning, you might want to consider using a separate GPS unit and linking the data later.
Start every project with an accurate baseline. Our Building Surveys Services deliver complete assessments of existing conditions — helping you identify risks, validate assumptions, and make informed choices from day one.
Efficient Field Workflow with Cyclone Field 360
Working efficiently in the field is super important when you're dealing with large scanning projects. Cyclone Field 360 is designed to make this easier, letting you link scans, use GeoTags, and control the scanner remotely. It's all about getting the job done right the first time, saving time and headaches later on.
Linking Scans for Seamless Integration
Linking scans in the field is a game-changer. Instead of waiting until you're back in the office, you can start piecing the project together right away. This means fewer surprises when you import the data into Register 360. Think of it like assembling a puzzle – you can see the big picture as you go, making sure everything fits together nicely. You can have a project with a combination of FIELD 360 pre-registered links and unvalidated links. SmartAlign can shorten the time required for Auto Alignment by creating pre-defined links based on time or distance before importing the data.
Utilizing GeoTags for Enhanced Data
GeoTags are your friend. They let you add location-based information to your scans, making it easier to organize and find specific areas later. It's like adding labels to your data, so you know exactly what you're looking at. Tags and assets from Cyclone FIELD 360 are imported to the dataset along with the other scan data. Tags and assets are published as part of an LGS file for use downstream in TruView, JetStream and CloudWorx as GeoTags to enable smarter data access.
Capture reality in high detail and translate it into actionable data. Our 3D Scanning Services provide a fast and accurate way to document built assets, enabling better decision-making across planning, construction, and operations.
Controlling the Scanner Remotely
Being able to control the scanner remotely is a huge time-saver. No more running back and forth to start and stop scans. You can do it all from your tablet or phone, giving you more freedom to move around and get the best angles.
Remote control also means you can access hard-to-reach areas without putting yourself in harm's way. Safety first, always.
Importing and Processing RTC 360 Data
Importing Projects into Register 360
Okay, so you've got all this sweet data from your RTC 360. Now what? The first step is getting it into Register 360. Think of it like moving your stuff into a new house. You can drag and drop the project folder right into the import area, or you can use the browse file command. It's pretty straightforward. The cool thing about RTC 360 data is that it brings along extra goodies like auto-registration options, multimedia, metadata, and even geolocation info.
One thing to keep in mind is that Register 360 uses the setup position information from the RTC360 to create links. These links are then used for auto-registration. It's like the software is trying to figure out where everything goes automatically, which saves you a ton of time.
Reviewing Key Tools in Desktop Software
Once your project is in Register 360, it's time to get familiar with the tools. The interface might seem a bit overwhelming at first, but don't worry, you'll get the hang of it. You've got your toolbars, workflow tabs, and navigation tools. Spend some time clicking around and seeing what everything does. It's like exploring a new video game – you gotta learn the controls!
Understanding Automatic Registration
This is where the magic happens. The RTC 360, especially when paired with Cyclone FIELD 360, has some serious auto-registration capabilities. Register 360 uses the setup positions and any pre-registration data from FIELD 360 to automatically align your scans. It's like the software is doing a puzzle for you. Here's a few things to keep in mind:
- The software creates tentative links (those yellow dotted lines) based on the Visual Inertial System (VIS) data.
- Geolocation and setup position information makes it easier to modify bundles, combine jobs, and perform Smart Align.
- You need at least one sitemap with all setups in one bundle to proceed to the Finalize area.
Automatic registration can save you a ton of time, but it's not always perfect. Sometimes you'll need to tweak things manually, which we'll get into later.
Advanced Registration Techniques
Alright, so you've got the basics down. Now it's time to get into some of the more interesting stuff when it comes to registration. Sometimes, the automatic stuff just doesn't cut it, or you want to have more control over the process. That's where these techniques come in handy.
Manual Alignment Without VIS Technology
Okay, so your Visual Inertial System (VIS) isn't cooperating, or maybe you're working with older data. No sweat! You can still get things aligned manually. This involves identifying common points between scans and using them to align the point clouds. It's a bit more hands-on, but it gives you a ton of control. Think of it like piecing together a puzzle, but with point clouds. It can be tedious, but sometimes it's the only way to get a really accurate result. It's all about finding those key features that line up perfectly.
Leveraging Pre-Registration Data
If you're using Cyclone Field 360 in the field, you can actually do some pre-registration work right there. This can save you a lot of time back in the office. By linking scans together in the field, you're essentially giving Register 360 a head start. It's like telling the software, "Hey, these scans definitely go together!" This is especially useful in complex environments where automatic registration might struggle. You can even combine pre-registered links with unvalidated links.
Smart Align and Bundle Modification
SmartAlign is a cool feature that can speed up the auto-alignment process. It creates pre-defined links based on time or distance before you even import the data. It's like giving the software a hint about where to look for matches. And if you mess up? No problem! You can always modify the bundles. You can delete bad links, combine jobs, and generally tweak things until everything lines up perfectly. It's all about having the flexibility to fix mistakes and optimize your registration.
Think of SmartAlign as a way to give Cyclone Register 360 a little nudge in the right direction. It's not a magic bullet, but it can definitely save you some time and effort, especially on larger projects.
Optimizing Scan Data Quality
Alright, let's talk about getting the best possible data from your RTC 360. It's not just about pointing and shooting; a few smart choices can make a huge difference in the final product. We're talking cleaner point clouds, better images, and less headache down the road. Trust me, spending a little extra time here pays off big time later when you're trying to register and process everything.
Managing Double Scan Cleaning
So, the RTC 360 has this cool feature called "double scan." Basically, it takes two scans from the same spot. The software then compares them and filters out any points that don't show up in both. Think of it as a built-in noise reducer. It's especially useful in areas with a lot of movement, like near trees on a windy day or in busy environments. Using double scan cleaning can really improve the accuracy of your project.
Capturing HDR Panoramic Images
HDR (High Dynamic Range) panoramic images are a game-changer. The RTC 360's camera array is pretty good, and HDR takes full advantage of it. Instead of a single exposure, it captures multiple images at different exposures and combines them. This means you get way more detail in both the bright and dark areas of your scene. No more blown-out highlights or completely black shadows! You can even adjust the exposure within Cyclone REGISTER 360 to fine-tune the results. This is super helpful for creating realistic and visually appealing deliverables.
Convert your point cloud data into intelligent BIM models that everyone on your team can use. With our Scan to BIM Services, you’ll gain a coordinated, Revit-ready model that supports faster design, fewer clashes, and smoother project delivery.
Generating High-Quality HDR Point Clouds
If you're using a newer RTC scanner, you're in luck – you can get HDR color in your point clouds too! This means the point cloud itself has color information derived from those HDR images. It makes the point cloud much easier to interpret and visualize. Plus, you can adjust the brightness of the point cloud right in the software. It's like having a built-in lighting control for your 3D data. This is especially useful when you need to show off the data to clients or stakeholders.
Getting good data at the source is way easier than trying to fix it later. Think about it: spending an extra minute or two at each scan location to make sure everything is dialed in can save you hours of cleanup and rework in the office. It's all about being proactive and thinking ahead.
Post-Processing and Finalization
Alright, so you've scanned, registered, and cleaned your data. Now it's time to wrap things up and get your project ready for delivery. This stage is all about making sure everything looks good, is organized, and is easily understandable for whoever needs to use it. Let's walk through the final steps.
Reviewing and Optimizing Imported Data
Before you finalize anything, take one last look at your data. This is your chance to catch any lingering issues. I usually start by checking for any remaining noise or misalignments. Pay close attention to areas where scans overlap; these are prime spots for errors to hide. You might need to do some manual cleanup or adjustment, even after the automatic registration. Think of it as the final polish before presenting your work. It's also a good idea to review the overall structure of your project to make sure it's logical and easy to navigate.
Finalizing Project Deliverables
This is where you decide what you're actually going to hand over to the client or whoever needs the data. Are you providing a point cloud, a 3D model, a set of panoramic images, or something else? Make sure you're clear on the requirements and that your deliverables meet those needs. This might involve exporting the data in a specific format, creating a custom coordinate system, or adding annotations and measurements. It's all about tailoring the final product to the specific use case. For example, you might need to process RTC360 data with Register360 for projects of all sizes.
Generating Comprehensive Reports
Don't underestimate the power of a good report. A well-written report can make your data much more understandable and useful. Include information about the scanning process, the registration accuracy, and any adjustments you made. Add screenshots, diagrams, and tables to illustrate your findings. A good report not only documents your work but also adds credibility to your results.
Think of the report as the story of your project. It should explain what you did, why you did it, and what the results mean. A clear and concise report can save a lot of time and effort down the road by answering questions before they're even asked.
Here's a simple example of what a section of your report might include:
- Project Overview: A brief summary of the project goals and scope.
- Scanning Parameters: Details about the scanner settings, resolution, and scan density.
- Registration Results: Information about the registration accuracy, including error metrics and visual assessments.
- Data Processing Steps: A detailed description of the steps taken to clean, align, and optimize the data.
Conclusion
So, that’s pretty much it for getting started with the RTC 360. It might seem like a lot at first, but once you get the hang of the setup and how the workflow goes, it’s really not that bad. Just remember to take your time with each step, and don't be afraid to try things out. The tips we talked about should help you avoid some common headaches. With a little practice, you’ll be scanning like a pro in no time. It’s a pretty neat tool once you get comfortable with it.
Frequently Asked Questions
What exactly is the RTC360 system?
The RTC360 is a super-fast 3D scanner. It uses special cameras and sensors to quickly map out spaces. Think of it like a super-smart camera that also knows exactly where it is in a room.
How does the Visual Inertial System (VIS) work?
The VIS helps the scanner know its exact location as it moves. It's like having a built-in GPS that works indoors. This helps the scanner put all its measurements together correctly. The RTC360 LT doesn't have this feature, so you have to help it figure out where it is more manually.
How do I connect the RTC360 to my tablet?
You connect the scanner to an app called Cyclone Field 360 on a tablet or phone. This app lets you tell the scanner what to do, check the quality of the scans, and even add notes or special markers to your data while you're still on site.
What are GeoTags and why are they useful?
GeoTags are like digital sticky notes you can add to your scan data. They mark a specific spot in the 3D space and can hold pictures or other information. They help you remember important details about different areas you've scanned.
How does the scanner data get put together on the computer?
After you scan, you bring the data into a computer program called Register 360. This program automatically puts all your scans together, making a complete 3D model. It's really smart and uses the information from the scanner to line everything up perfectly.
What do "double scan cleaning" and "HDR point clouds" mean?
Double scan cleaning helps remove any extra or overlapping bits of data that might make your 3D model look messy. HDR panoramic images and point clouds mean the scanner captures very detailed pictures and measurements, even in tricky lighting, making your final 3D model look much better and more realistic.
Maximize the value of your projects with accurate data, intelligent models, and immersive visual experiences. Data Capture Service delivers end-to-end support to help you plan, design, build, and manage with confidence:
- As-Built Documentation Services
- Scan to BIM Services
- 3D Scanning Services
- Floor Plans Creation Services
- Building Surveys Services
- Virtual Tours Creation Services
Ready to explore in more?
Start here:
.avif)
.avif)
.avif)
.avif)
Prefer to Speak Directly?
Experience precision in every project.